You look in the mirror every day. And precisely because of that you barely notice anything changing. The brain adapts incredibly quickly to small daily changes and filters them out. It is only when someone sees you after a longer period that they say: "Have you lost weight?" Or: "You look so much fitter."
Progress photos tackle that problem. They freeze a moment in time, so you can compare it objectively with later.
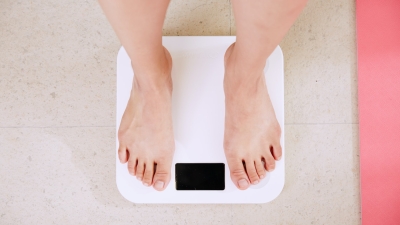
Why photos tell more than the scale
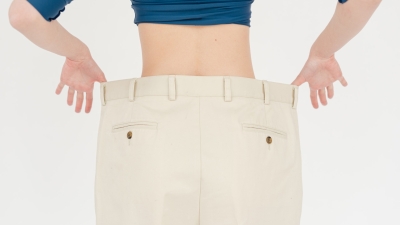
The scale measures mass, not shape. Someone who loses fat and builds muscle at the same time can maintain the same weight for weeks, while their body changes noticeably. A photo shows that, a scale does not.
Photos are also a powerful motivational tool. Comparing a photo from three months ago with today often gives a surprising look: you no longer consciously noticed the change, but it is unmistakable on the image.
They are also honest in a way that the scale cannot be: you see where fat is, where muscle grows, how your posture changes and how your body shape evolves.
How do you take the best progress photos?
The value of progress photos lies entirely in their consistency. Comparing one nice photo now and a bad photo three months from now makes no sense. The point is that all variables are as similar as possible.
Light
Always use the same light. Artificial light from a different angle or a cloudy day versus bright sun makes an immense difference. The best option: a permanent place in the house with good, constant daylight (but not direct sunlight), or always the same artificial light source.
Side light (from the side) highlights muscle definition and body contours better than frontal light. Try to reproduce this with every photo session.
Position and angle
Always take photos from the same three angles: from the front, from the side (left or right) and from the back. That gives a complete picture and shows you the difference in places that you never see well in the mirror, such as your back and the back of your legs.
Always place the camera or phone at the same height. Hip height or slightly above is a good choice for most people. A camera from below makes you taller and slimmer, while from above you are smaller and wider. Consistency in height is crucial.
Use a tripod or place the phone on a solid surface. Selfies in front of the mirror also work, but the arm in the photo distorts the image. A timer or remote control gives the most neutral photo.
Attitude
Always stand in the same neutral position: straight, feet shoulder-width apart, arms lifted slightly from the body. No posing or sucking in belly, no puffing chest. The most neutral position that you can always reproduce.
Wear the same clothes for every photo, or as little as possible. Swimming trunks or sports underwear provide the most fair comparison. Clothing can hide or exaggerate a lot.
Time
Always take your photos at the same time of day. Fasting in the morning, before breakfast, is the most consistent choice: your stomach is empty, you are slightly dehydrated and there is as little daily variation as possible in your body.
Do not take your photos immediately after an intensive training: blood flow in muscles gives a temporary "pump" that makes you look muscular. That disappears after an hour.
How often do you take progress photos?
Every two à four weeks is ideal. Too often (weekly) produces too little visible change to be motivating. Too little (annually) misses the interim progress that keeps you on track.
When starting a new process, always make a baseline measurement: take photos on the first day, even if it feels uncomfortable. That photo will be your reference point later and is the most valuable of all. Those who do not have a starting photo will later compare with a vague memory image.
Save and compare
Save your photos in a permanent place with a clear date in the file name (e.g. "20240101_voor.jpg"). Create a separate folder per period.
Apps like Progress (iOS/Android) are specifically designed for tracking progress photos: you load them and can tile or blend them. This makes small changes visually visible that you would miss with a simple comparison.
The psychology of progress photos
Taking progress photos is uncomfortable for many people, especially at the beginning. You see yourself in a way that can be confrontational. That feeling is understandable, but it is also exactly why they work: they force you to be honest with yourself.
Save those opening photos and don't look at them every day. Put them away, get to work, and only compare them after eight à twelve weeks. The change you see is almost always greater than you expected.
Frequently asked questions
Should I share my progress photos to stay motivated?
My photo looks better than three months ago but my weight is the same. What's right?
Which camera or phone is best for progress photos?
In summary
Progress photos are one of the most underrated tools for tracking your physical progress. They show what the scale does not see. The key is consistency: same light, same angle, same time, same clothes. Always take a starting photo on day one, even if it feels awkward.
→ Combine your photos with body measurements for a complete picture.
→ Back to the Current ME overview.
Bart Vandenbussche is passionate about sport and never shies away from a sporting challenge. He has run several marathons (including sub-3h), is an Iron+Ultra Viking, and currently has the Hyrox bug.
Question or suggestion?
Do you have a question or suggestion? Let us know!
Tags